The ability to control Depth of Field (DoF), the extent of an image that is in sharp focus, is a key tool in a photographers toolbox. I explained quite a bit about DoF in this post so I won’t repeat much here except to reiterate that by controlling DoF you can determine what areas you want IN focus, and what areas (if any) you want OUT of focus.
Often, a shallow DoF is used to draw attention to the subject or to blur out a distracting background. Conversely a large depth of field will allow more of the frame to be in focus.
Then there is something called Hyperfocal distance which is a combination of lens focal length and the aperture you select that will allow virtually the whole shot to be in focus. This is especially useful for landscape photographers.
I recommend the HyperFocal Pro phone app for calculating the HF distance. For example, if I take my Canon 5D MKII and the 24-105 lens, set at 24mm with an aperture of f/11, I can focus at 1.8m and everything from 1.34m to infinity will be in focus. If I change to the 105mm end, my DoF drops to just 1.8m.
But there are other ways of affecting the areas of focus in an image apart from DoF.
Lenses such as the Lensbaby range are designed to have a ‘sweet spot’ in the centre and let the outer edges blur. I have a Lensbaby Spark
with a bellows arrangement that allows you to change the angle of the focal plane slightly too.
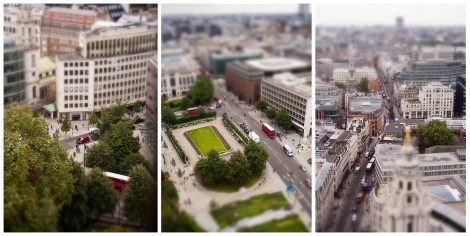
Tilt Shift Lenses give much more adjustment in terms of the focal plane angle, they can be quite expensive and need some practice to get right but they can produce interesting images. Of course you can always ‘fake’ a tilt-shift image;
Then there’s freelensing where you detach your lens from the camera and simply hold it up to the body. Just be careful not to get any dirt or dust on your camera sensor!
You can also try turning the lens around and holding it back to front – in fact you can buy reversing rings for this purpose that will allow you to attach your lens (backwards) on to your camera. This will turn your normal lenses into macro lenses with very shallow DoF – it takes some practice to get this technique right but it can give some pleasing effects like the one below and the dandelion at the top of this post.
Another way to introduce blur is with Vaseline, but DO NOT smear it on the front of your favourite lens. Buy a cheap clear glass filter, mount it on your lens, then smear Vaseline on this. When you’re done, carefully wipe off as much as you can and remove the filter, trying not to get any Vaseline anywhere near your nice kit. This gives a nice artsy blur effect.
Of course you can also introduce another lens to the front – by shooting through a magnifying glass or pair of glasses. Taken even further, you can buy a clear glass crystal ball and shoot through that, with the added fun that whatever is seen through the ball is inverted.
P.S: The magnifying glass and effect were all created in Photoshop by following this tutorial; http://www.pvmgarage.com/2010/04/how-to-create-a-magnifying-glass-icon-in-photoshop/


One comment
[…] Hyperfocal Pro which I discussed here […]